Hi friends today i am sharing a best tutorial for creating a wood panel structure using photoshop. This is really a basic tutorial which can be understood by a basic learners also. So friends have a look at this tutorial and kindly give your suggestion in order to improve myself.
Final Product What You'll Be Creating
In today’s quick tip tutorial we will demonstrate how to create a wood panel texture in Photoshop. Let’s get started!
Step 1
Start by opening a new document. For this tutorial, I chose 900 x 600 pixels with a transparent background. Fill the document with #473722

Step 2
Duplicate layer 1 and name this duplicate "fibers". Set your foreground color to #746045, and then go to Filter > Render > Fibers and use the following settings:

Step 3
Hit “OK” and you should end up with the following:

Step 4
Duplicate the previous layer and name it "knots". We are now going to add what I call knots in the wood. To do this, go to Filter > Liquify. In the upper left-hand panel, select the Twirl Clockwise Tool (C). On the right side panel, your settings may differ from mine depending on the size you made your document, but for the sake of this tutorial your settings should match mine: Brush Size – 151, Brush Density – 62, Brush Pressure – 100, Brush Rate – 50. Leave all other settings as is. On your document, click in the desired spot and quickly drag upwards or downwards with your mouse button still pushed. You should have something similar to this:

Step 5
Make a new layer and name it “separator 1″. We are now going to make the notches or separators in the paneling. Select the rectangular marquee tool
and set it to a fixed ratio with a width of 4px and height of 600px and then place it somewhere near the left side of your document. Fill this block with #806d53.
Should look like the following:
and set it to a fixed ratio with a width of 4px and height of 600px and then place it somewhere near the left side of your document. Fill this block with #806d53.
Should look like the following:

Step 6
Now we make the line look more realistic! Double click the separator 1 layer to bring up the blending options and match it with the following settings:

Step 7
Duplicate your first separator about 4 different times and place them so that they’re not evenly spaced. For added touches, you can place some text that
looks as if it was carved in, like so:
looks as if it was carved in, like so:

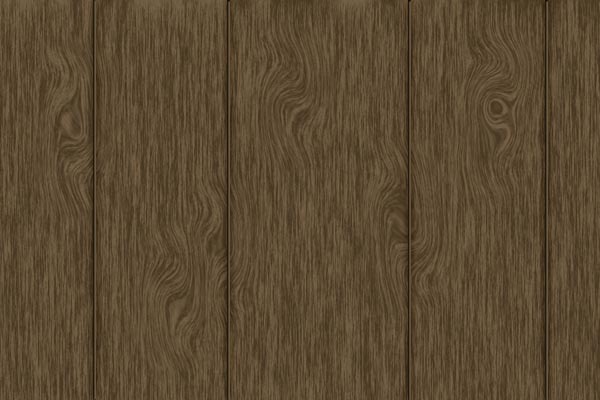
Final Image
You’re all finished! I hope you enjoyed this tutorial.
No comments:
Post a Comment